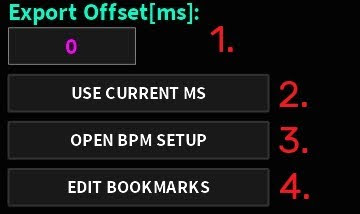
Map creation
Learn how to make your very own maps using the Sound Space Quantum Editor (SSQE)
Creating a map
On the menu that has popped up, you will see the following options:
- Create New Map: used to create a new empty map as well as its asset file.
- Load Map: used for loading saved maps.
- Import Map: used to import map data (raw data / GitHub links).
- Settings: mostly used for customizing.
- Autosaved Map: used to load an autosaved map, if one exists.
- Edit Last Map: used to load the last manually saved map.
Head over to Create New Map to create a new map, then get an audio file of the song you want to map, either in mp3 or ogg audio format. If done correctly, the Editor layout should pop up (first image on the next section).
Details
You'd normally need an audio ID from the Roblox Audio Library to map. However, this method is hardly viable since there are various restrictions over public audios (since March 2022). Therefore, importing audios directly is the best way around.
Timing
Before starting to place notes, it's important to time the map properly using timing points.
You can set them up via: Timing > Open Timing Setup:
Inside this menu, we have a few more assets that have to do with timing points:
- Add Point: Adds a new timing point with the indicated BPM and Offset (on the left) to the list above. Said list can have as many timing points as needed, but cannot have any repeated ones.
- Delete Point: Deletes the selected timing point(s).
- Update Point: Updates the selected timing point(s) with the input BPM/Offset.
- Current Pos: Updates the input Offset to the current position on the track.
- Move Selected Points (ms): Moves the selected Timing Point(s) according to the Offset.
- Importing Timing Points: Using Paste X Timings or Open Beatmap Timings, you may be able to import the timing points from another rhythm game maps.
Both options support:- osu! (any gamemode)
- A Dance Of Fire And Ice (ADOFAI)
- Clone Hero (CH)
- Open BPM Tapper: Allows you to approximate the song’s BPM by tapping a button to the beat.
TIP
In case you're not familiar with timing songs, it's best to get the timings from other rhythm games' charts (like osu!). But if you're willing to learn, check out this article.
Note placing
Now that you have everything set up, you can start placing down notes. The keybinds are as follows:
- Q or 7 for top left corner (2|2)
- W or 8 for top mid (1|2)
- E or 9 for top right corner (0|2)
- A or 4 for middle left (2|1)
- S or 5 for middle (1|1)
- D or 6 for middle right (0|1)
- Z or 1 for bottom left corner (2|0)
- X or 2 for bottom mid (1|0)
- C or 3 for bottom right corner (0|0)
If you have an older version of the Editor, you might also be able to use the Y key as bottom left corner.
Details
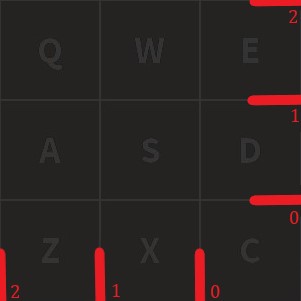
The numbers represent the (-X|Y) coordinates of the note:
As you can see, the X axis is inverted.
Other important keybinds
- Deleting notes: Select the notes, then press Delete
- Undo/Redo: Press Ctrl + Z/Y.
- Copy/Paste: Select the notes, then press Ctrl + C/V.
- Moving the timeline: Left/Right to move 1 divisor line, scroll for unlimited movement.
- Zoom: Hold down Ctrl, then scroll.
- Save: Press Ctrl + S.
TIP
Though these are the default keybinds, you may change them anytime in Settings.
Mapping tips
A few tips in case you've never mapped any song before:
- Always time your maps correctly using Timing Points appropriately
- Play a lot of different maps to gather ideas.
- Ask for feedback when needed, especially to those who understand mapping well.
- Try to be consistent while mapping; this means the quality of your maps should be more or less equal. And most importantly, follow the community guidelines and have fun!
Saving
Lastly, once you have finished mapping, you can save the map in different ways:
- Pressing Ctrl + S: Triggers a data overwrite, meaning your older save will be replaced.
- Clicking Back to Menu: Triggers a popup which will ask the user to save before closing the map. The editor also automatically overwrites the map’s data with a certain frequency (changed via Settings).
As for the maps you make, it is recommended that you store them in the editor’s folder, so you won’t lose any.
You may even have map folders inside of it!
WARNING
You might notice that a .ini file has saved along with your map.
This file includes the map's timing assets, so make sure you don't delete it.
If everything went fine until now, you should have created your first map! Congratulations!